Landscape grading yard is an art; and anyone who’s spent hours with their dozers and skid steers can confirm this fact. Adding a natural vibe to things, all while nature has messed up by putting the high and low points in the wrong spots, requires genuine talent. However, this also needs to be backed up by expertise, as grading, per se, is also a science.
So, how do you master this unique skill which is also a perfect blend of art and science? Well, all you need to do is follow a couple of basic techniques. As you do this, you also inadvertently ensure that the landscape functions well in addition to looking exceptionally well.
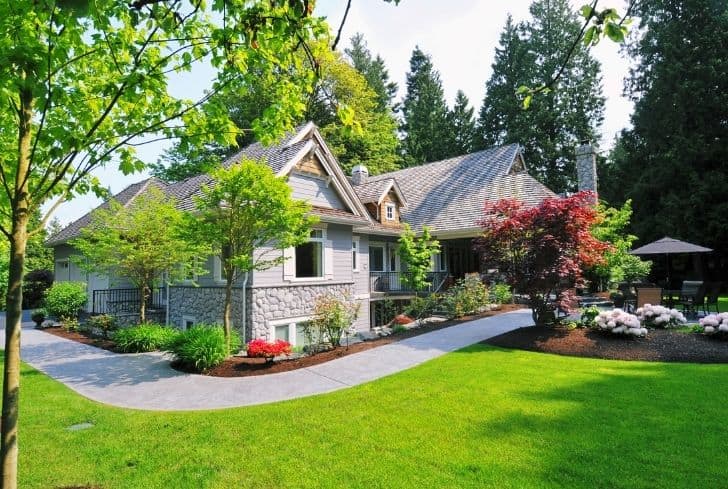
Whether you’re a beginner or an expert, it is vital to have a solid grading plan that doesn’t merely consider the water (and other basic) requirements, but also complements your building and enhances the points of interest. As an efficient landscape grader, you need to consider both aesthetics and functionality.
In this article, we will give you a brief lowdown on landscape grading, by sharing 15 effective techniques that’ll surely transform the look and feel of your garden.
15+ Effective Techniques For Grading The Landscape Yard
1. Give It Time
Ideally, grading should be performed at least a week before you proceed to plant your crops. Unless you give it the required time, there might be issues pertaining to the settling of the soil. The ultimate result will be an uneven soil bed which will further hinder the growth of plants.
If, however, you have no other option but to rush, make sure you back the soil with ample water. Next, you should line out the surface to make it appear even. Finally, roll it out the soil right after it dries up for a while.
This entire process will speed up the settling of soil which in turn will make way for fresher, healthier, and faster-growing crops.
2. Address the Drainage Issues
When it comes to sloped landscapes, drainage stands out to be one of the biggest issues. That is one of the many reasons why you need to address this before proceeding with the rest of your tasks. To do this, assess your total landscape and check where and in which manner the water runs along.
Since you won’t be allowed to drain water from your area to your neighbors’ properties, it is best to check your property report for better understanding. Assess the report thoroughly and check if there’s an arrangement for drainage easement since the elevation cannot be altered at a later point. Since areas like patios and decks tend to tap in some degree of input, make sure their slope doesn’t exceed 2%.
Having a clear understanding of the drainage situation will prevent potential damages to your property while also shielding it from waterlogging, mold, and similar other damages. To further full-proof your grading schedule, it is best to consult your municipal corporation for a rough and final grade certificate.
3. Get Ample of Dirt
Yard grading is one of those processes that require plenty of soil and dirt. That is why it is important to source the dirt right before you start grading your property. In almost every case you are likely to require more dirt and soil than you would originally expect. So, if you are getting topsoil from your local store, make sure that is provided in bulk to address all your soil settling needs. Since the dirt alone will hold the soil, do not compromise on its quality either.
4. Locate the Utility Lines
While grading your landscape it is vital to understand where and how your utility lines move. So, consult an expert and mark the lines for water, gas, electricity, and telephone. Mark it on the ground to ensure that no pipe or line is damaged throughout the process of digging.
As previously mentioned, it is also important to locate the nearest drainage area. This way, you will have complete clarity in which direction the water is flowing and whether or not it is affecting your grading plans.
Finally, once you’re done with these prerequisites, start marking the area you plan to grade or level. As you do this, also locate the highest and the lowest points in that specific area. Over time, this will help in establishing the accurate level grading line that you are planning to achieve. For best results, it is recommended to create a 90-degree angle from your lowest and highest zones.
5. Do Not Grade at Greater Heights
This is probably one of the rookie mistakes most newbie cultivars make. In case you are planning to grade the yard in the proximity of your property, leave at least 6 to 8 inches in the middle of the grading and sliding area. If you have a drainage issue, do not try to solve it by heaping dirt along your property’s side. While this may work short-term, in the long run, it will negatively affect your grading plans and end up ruining your property.
Finally, when you are done hoeing, rake the ground to make sure it has a proper and leveled finish. You can double-check this by adding plywood. This will also go a long way in helping you pack the dirt down.
6. Always Pile the Dirt in the Low Point
Since you have created lines for the high and low points and ordered topsoil to get the job done, it is now time to pile your dirt correctly. When it comes to piling the topsoil, the general rule of thumb is to pile it in your low point. Start by shoveling the topsoil in a large wheelbarrow and gently dump it along with the low point. This way, if the water drains towards your property at any point, you will have a big pile of dirt around your foundation that can further reverse the overall grading structure.
Since it is the low point we are talking about, it is important to dump enough dirt here so that this point eventually goes on to be your high point. Since you already took the measurements this should be much simpler than you presume. Just make sure the pile of topsoil is at a greater height than the number you came upon your tape measure.
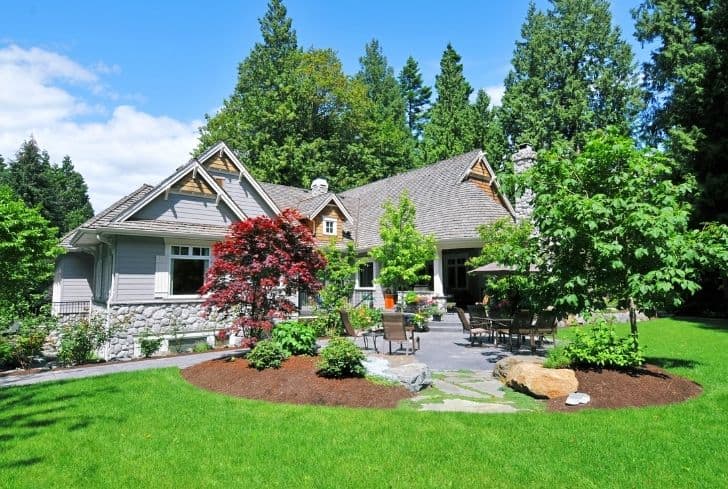
7. Focus on the Curved Beds
Curved lines, especially if they are around the boundary plants, borders, and entry edges may tend to pose some issues. However, this can be duly managed with a handy rope or a garden hose. Use either or both these tools to layout a perfect curve. After this, you can start marking the lines with the shorter stakes that stand at an interval of a couple of feet.
While working on the landscape design, some gardening enthusiasts use small and super-thin boards that are steadily nailed on the stakes and driven deep into the soil. This kind of edging makes way for easier finishing and while also simplifying your task of maintaining perfectly neat edges.
8. Fill It Up
Now that you are done piling the dirt, it is now time to push it down. One of the easiest ways to do this by laying out the plywood on the dirt and then walking, jumping, and even stomping on it. This will make sure that you fill everything up without any excess holes.
Now take a sturdy rake and use its back to pull out your dirt from your new high zone to the new low zone. The idea behind this is to change the slope’s overall angle, and if you play your cards right and follow these guidelines, you will certainly end up doing it.
8. Sand Vs Topsoil
When it comes to filling the low zone, topsoil is one of the best options. However, some people also contemplate whether they can replace it with sand. The answer to this query and the much-deliberated topic is NO. That is because unlike topsoil sand tends to dry up really fast in hot summer. Over time, this is bound to hinder the growth of grass which will end up starving for water.
Topsoil, compost, or any other form of soil-based dirt nourishes the soil and helps in the growth of plants and grass. If, however, you are still inclined to use sand, we would recommend you to follow a 50:50 ratio, where half of it is sand and the remaining half is high-quality topsoil and compost.
10. Start Planting the Grass
Once you are comfortable with the new slope, it is time to start planting fresh grass. For this, roughly toss some grass seeds on your newly graded topsoil. Now start churning and gradually spreading the seeds with your rake to correctly set them in the soil. Don’t worry if a few of your grass seeds are on the surface as the majority of it is still embedded in the soil.
Once you are done spreading the seeds, soak this dirt with your water pipe to make sure your seeds have ample water. After this, cover the area with yard clippings, leaves, or light hay. This will help the grass retain moisture while also keeping them away from birds’ and insects’ reach. Finally, soak the entire area once again before you finally retire for the day. Water the grass every day to witness those pretty stubs peeping out.
11. Plant the Trees in Correct Order
When you are finally done with grading and are about to plant the trees and flowers, it is best to start with the trees and shrubs before proceeding with the flower beds. Grow them along the boundary lines even before preparing the flower beds. Unless you do this, you might have to start to replant the trees and your edging structure will be ruined. So, if you really care about aesthetics do not ignore this point.
12. Check if You have a Grading Issue
Once you are done grading, you need to re-check for grading issues. In most cases, there is likely to be an issue if you still find water standing in your yard. Standing water is one of the biggest breeding grounds for insects and since it also damages your property’s foundation, it is important to check if this problem is still persisting once you are done grading. In case it does, you may have to re-grade your soil from scratch.
13. Follow the Right Technique for Re-grading
If re-grading your soil is the only option, make sure you do it correctly. For this, first, remove the topsoil from the problematic zone, now steadily tweak the subsoil by moving off the high zones and filling in the low zones. Consider spreading around 2 to 3 inches of the subsoil and make sure it is tilled to the first two inches. This will further prevent drainage issues.
Once you are done, gently spread the topsoil. When done correctly, it is likely to add four more inches. In case you require additional topsoil, get a debris-free loam for best results.
14. Introduce Slope the Correct Way
This is yet another excellent guideline that goes a long way in helping you grade soil correctly. One of the key things that need to be done is establishing your property’s correct elevation. Once you do this, start pitching away as per the recorded elevation. Do this even if you need to tear out the shrubs and regrade the property as it will go a long way in maintaining the structural integrity of your yard while also preventing drainage issues.
15. Get the Right Tools
Your grading job will never turn out to be perfect unless you use the correct tools. That is why it is important to have a set of landscaping rakes, shovel (preferably flathead), carpenter level, stakes (preferably wooden), mulcher or lawn roller, wheelbarrow, and topsoil/compost even before you start the grading job.
Well, these were some of the tips that will certainly make soil grading easier. So, follow them and be patient throughout the entire grading process to deck up your property and level it up just the way you wanted.